The challenge
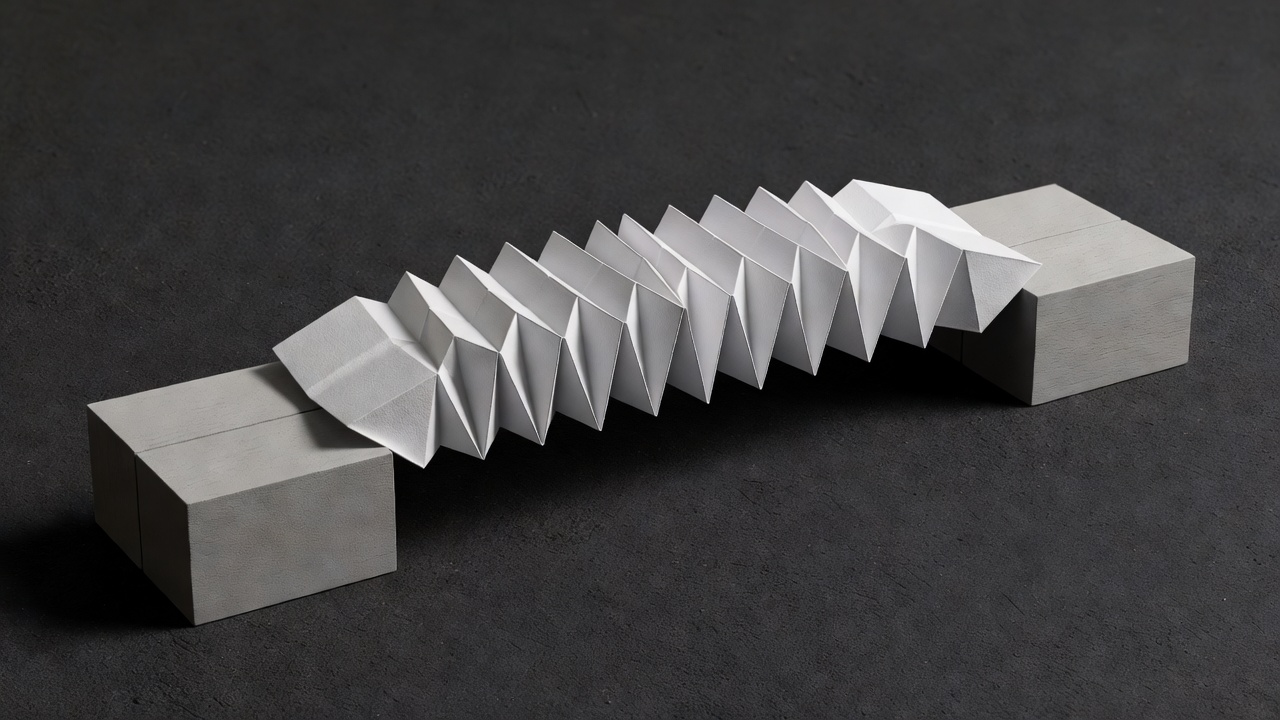
Make an accordion-folded paper bridge across a short gap, then see whether it supports an empty paper cup without your help. You have one minute for folding, positioning and one gentle test. Collecting materials, arranging supports and reading these instructions happen before the timer. If you need more time, finish safely and record that result honestly.
This is a construction test rather than a guaranteed trick. Different sheets behave differently, and a wide cup can rest awkwardly on narrow ridges. A bridge that bends or slips still gives you something useful to inspect. Notice where it failed before changing the design.
Preparation, outside the minute
- One ordinary A4 or US Letter sheet of printer paper.
- Two equal-height books with stable, flat covers.
- One small, empty paper cup and a ruler.
- A clear table with room to catch the paper if it slips.
Place the books about 10 cm apart. Align their edges and make sure neither book rocks. The gap is a starting condition, not a promised maximum span. Do not stack heavy books into towers. Use the sheet so its ridges will eventually run from one support to the other, rather than parallel to the gap.
Before you fold, place the flat sheet across the supports and try the empty cup briefly. Remove the cup if the paper sags sharply. This baseline comparison is preparation, not part of the timed build. Keep the same sheet, cup and support spacing for the second test.
Your timed attempt
- Start with alternating folds. Fold a strip about two finger-widths deep along the long edge. Turn the sheet over and fold back in the opposite direction. Repeat to create a concertina.
- Open the ridges slightly. Avoid flattening the whole sheet again. Aim for a repeating zigzag cross-section, with enough width to support the cup.
- Bridge the gap. Let both ends rest generously on the books. Check that the folds cross the open space from support to support.
- Test gently. Set the empty cup near the centre, release it and observe. Stop if the support books move or the cup becomes unstable.
Preparation complete?
Ready when your preparation is complete.
Observe before explaining
Did the middle bend, did a crease collapse, or did the sheet slide off a support? Those are different failures. A sliding bridge may need more overlap rather than more folds. A crushed ridge may need a lighter test object. Do not add coins or heavy objects simply because the first test worked.
Reveal why the folds can help
A flat sheet has very little depth in the direction it bends. Folding creates a deeper profile: some paper sits above the middle of the section and some below. This change in geometry can improve resistance to bending, even though you have not added material.
Creases also introduce weak spots, and paper is not an ideal engineering material. Moisture, grain direction and damaged fibres can change the result. The bridge succeeds through a useful shape, not because a crease makes paper universally stronger.
Make the comparison fair
For a second round, change only one thing: fold spacing, support gap or paper type. Keep the other conditions steady. Write “held the empty cup” rather than inventing a weight rating. If the flat sheet also held the cup, increase the gap a little in a fresh, untimed comparison instead of declaring the challenge pointless.
Precision is more interesting than spectacle. ISO 216 describes the A-series paper sizes, but a standard sheet size does not specify one universal stiffness. US Letter has different dimensions. Both can work here, provided you report which sheet you used and avoid comparing unlike setups as if they were identical.
The clever finish is a visible difference, not a heavier object.
Take the idea further
Paper engineering sits between craft and structure. Robert J. Lang’s Origami Design Secrets explores the geometry behind far more elaborate folds; Paul Jackson’s Folding Techniques for Designers is another route into folded forms. Neither book is required for this small experiment, and neither is presented as endorsing this site.
When you share a clip, include the preparation, the support gap and the unsuccessful attempt if there was one. Label a practice run as practice. A satisfying one-minute build is more convincing when the viewer can reproduce the conditions instead of guessing what happened off camera.